
Although yuzu, Japan’s favorite citrus, can be found all year round, the best time to seek out this flavorful fruit is the middle of winter when stores receive an abundance of it. During this time, most stores will sell a single yuzu for around ¥80-120, a bargain as traditionally this fruit is sold for a tad more. During the winter months, many people also flock to buy a bulk of the fruit for the yearly Yuzu Buro, or yuzu bath, a custom where one bathes alongside yuzu, bringing luck for the coming year.
As much as a long soak surrounded by my favorite citrus sounds amazing, this yearly bargain can’t be wasted on flavored bath water alone, so here are some fun, easy, and maybe one or two more complicated recipes you can try in the comfort of your own home.
Recipe #1: Yuzu Jam
There are many different ways one can use yuzu in the kitchen, but those who wish to make full use of this seasonal fruit look no further than Yuzu Jam as this recipe uses the whole of the yuzu from seed to skin. Making jam can be a little intimidating if you aren’t the most confident cook, but fear not, as with these simple instructions, making jam will seem as easy as boiling an egg.
To make your own Yuzu jam, you’ll need the following:
- Yuzu (As many or as little as you want to use. For this recipe, I used about 11 and made around 9 jars of jam)
- Sugar
- Water
- Filters or loose tea bags
- Jars for jarring
- Weighing scales
- One large pot
The reason none of these items have grams by them is that the final yield of your yuzu determines how much sugar you’ll be using. For example, 500g of yuzu will need 250g of sugar.
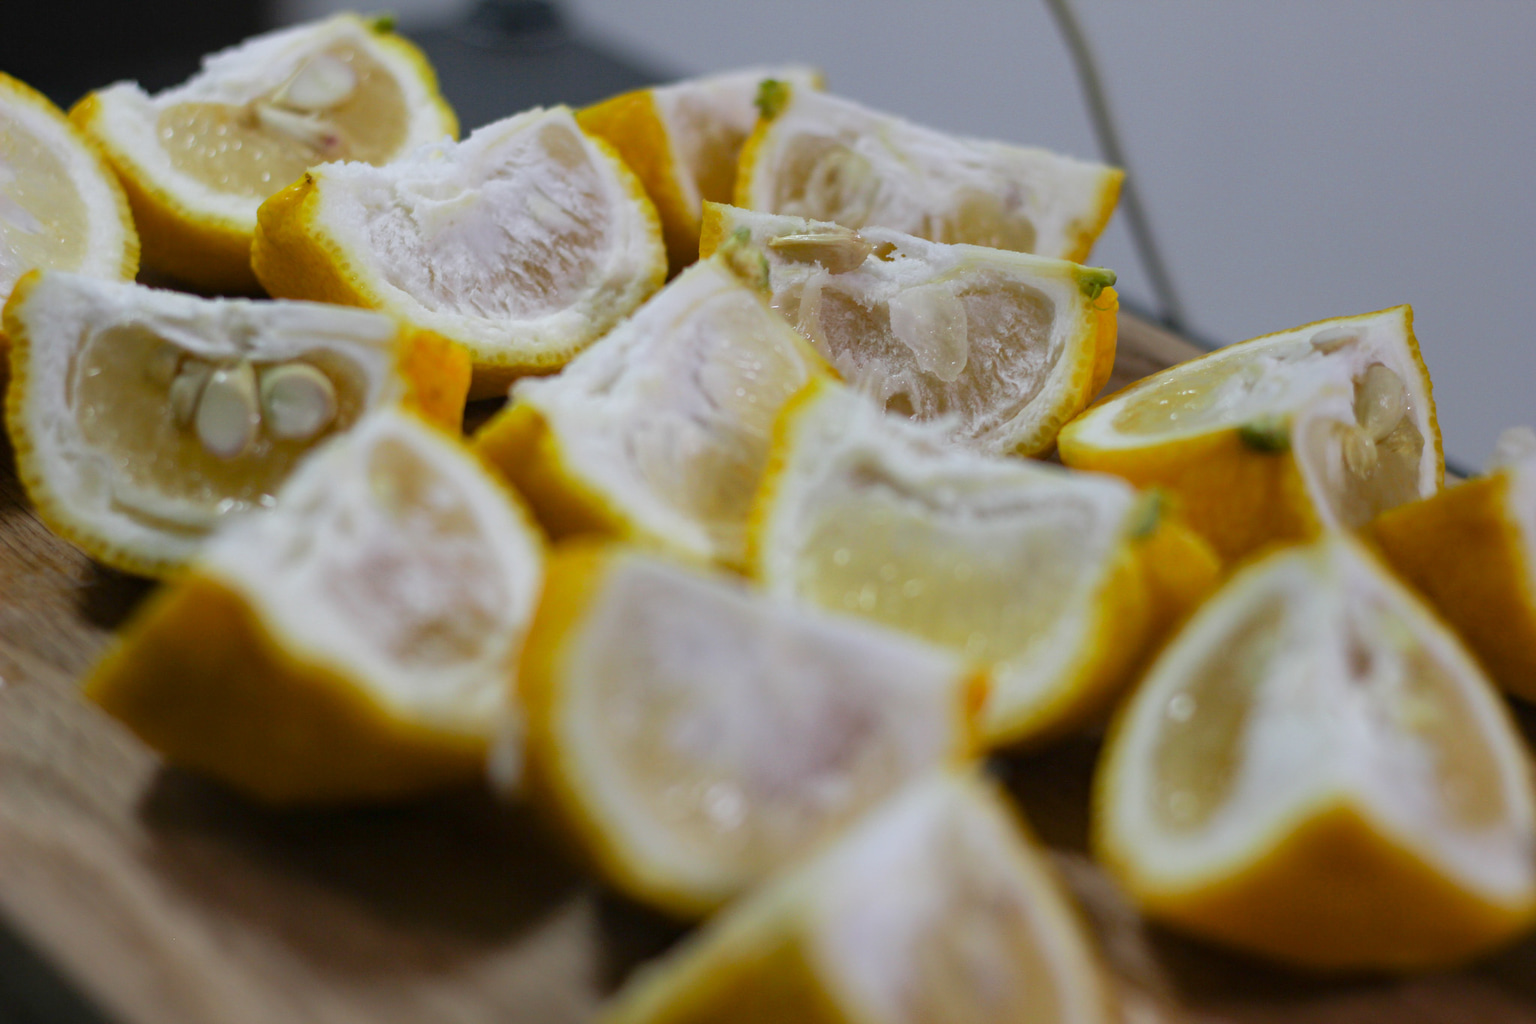
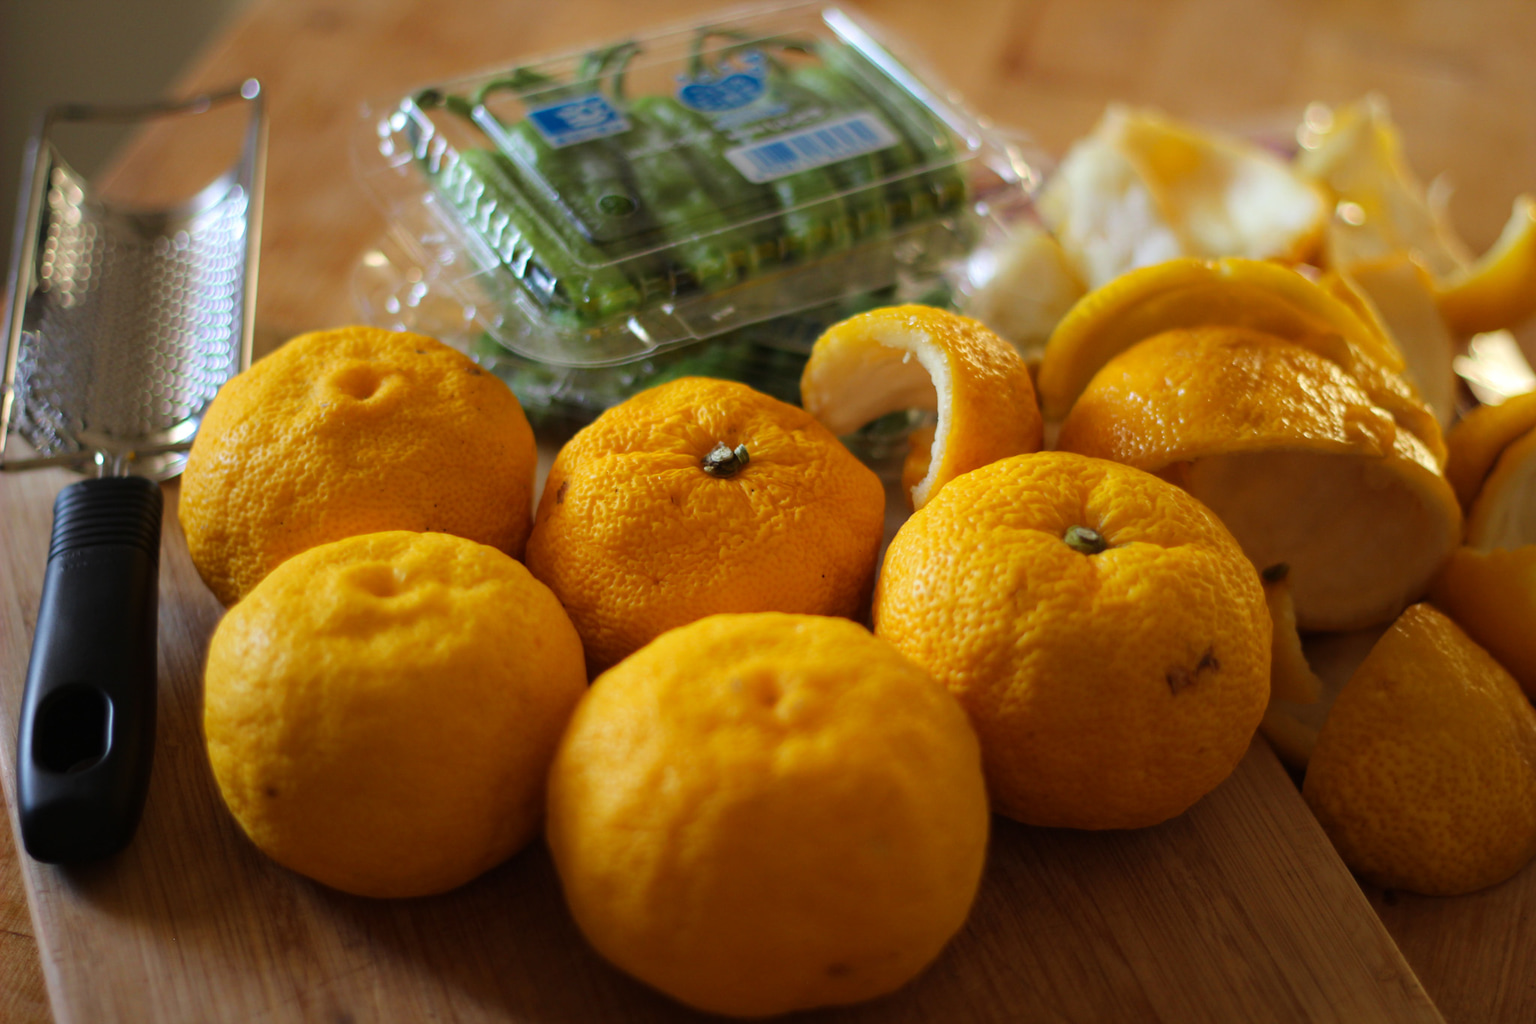
We are not, however, going to be weighing these yuzu whole — we first must break them down into a few different sections. Yuzu peel, yuzu juice and the yuzu flesh itself — we also want to keep the seeds but that doesn’t go into the final weight.
Start by washing and then juicing all of your yuzu, collecting the juice in one container, placing the seeds in another and finally placing the flesh in a third bowl. The peel will be moved to one side as it will need to be sliced up later.

A good method for this is using a lemon juicer to juice the yuzu and then pour the juice through a strainer into a bowl or container below. Remove the flesh from the yuzu skin and place the skin to one side and the membrane to the other, take extra time to make sure you have removed all the seeds from the membrane or it’ll cause problems later.
Move your juice, flesh and seed bowl to one side and begin to focus on the yuzu peel. Yuzu peel can be a little bit tough and thus a sharp knife is essential when slicing it up. You want the yuzu to be sliced into thin rectangles, nothing larger than a few centimeters, or you’ll create a strange chunky jam.
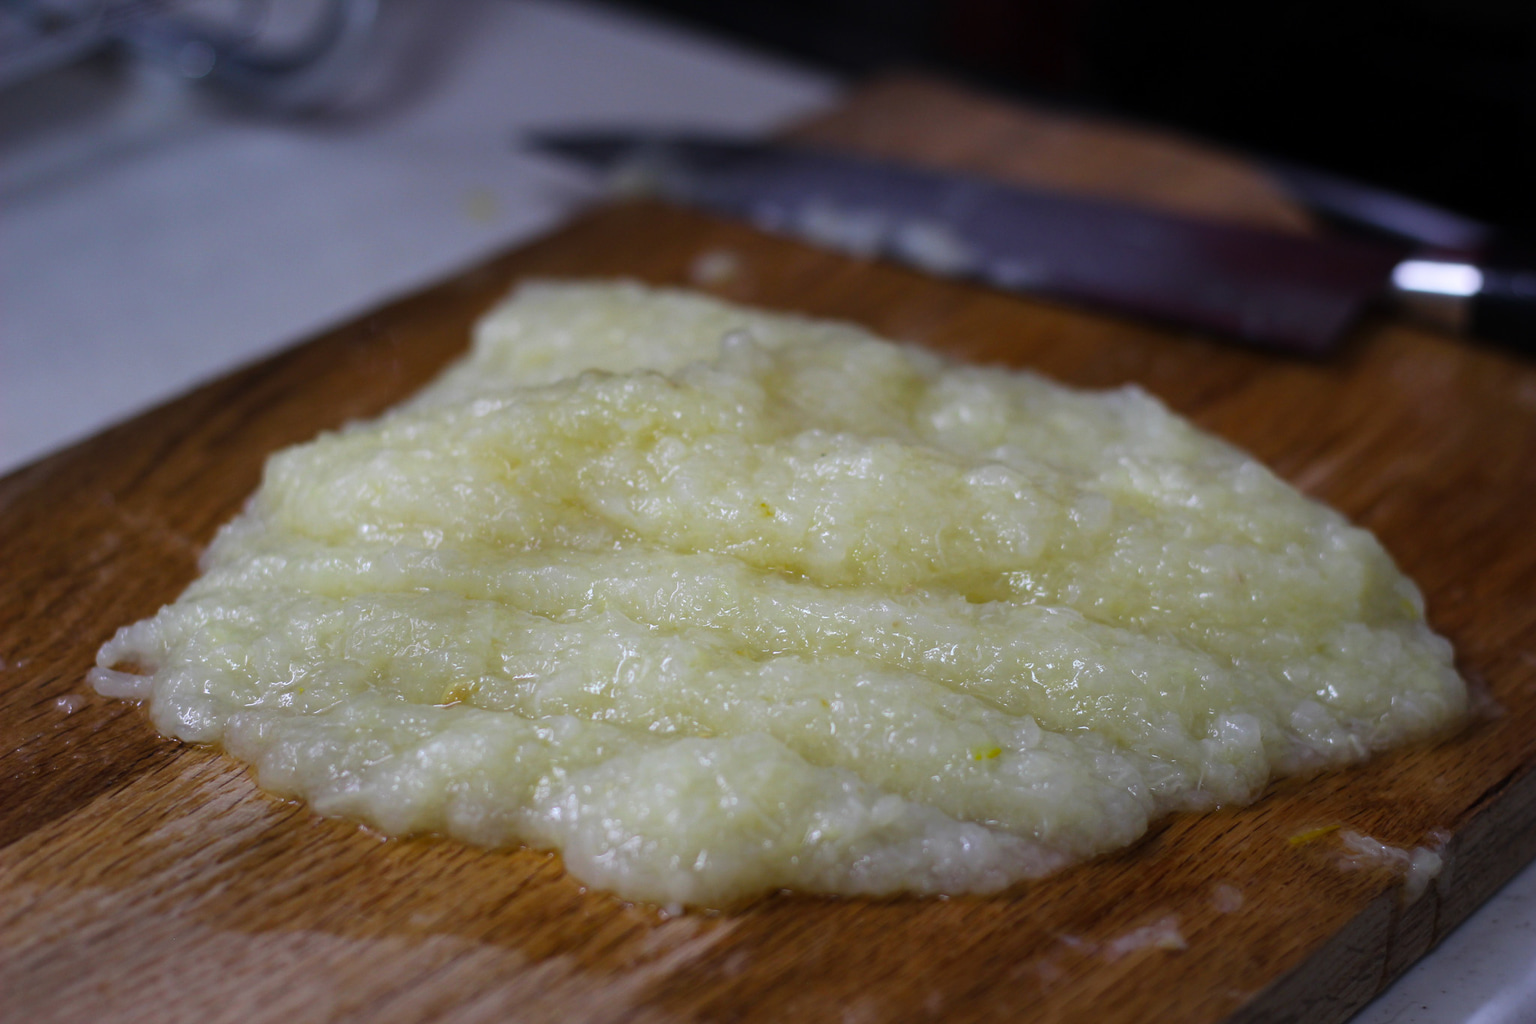
The final thing we must prepare is the yuzu flesh. Boil a pot of water and place the yuzu flesh inside of it, keep the water on a simmer for around 10 minutes while the flesh softens. At this stage, your whole kitchen will smell like fabulous yuzu tea, so making jam is worth it for this stage alone. Stew the flesh until soft and then run the whole mixture through a strainer. As nice smelling as that yuzu water is, it’s useless for our final product. Once drained, place the softened flesh onto a cutting board and begin to cut and mince the flesh until it’s almost a mush. This will act as the base of our jam.
Once all the ingredients have been prepared, place a pot, or a large bowl onto weighing scales and into said pot or bowl add your sliced yuzu peel, yuzu juice and the boiled yuzu flesh and note down the total weight. Mine was 1070g exactly and thus I needed to use 535g of sugar. In a large pot, add all your ingredients, including the sugar, and then fill the pot with enough water to cover all the ingredients. It’s at this stage that you want to take your yuzu seeds and place them in loose tea bags or tie them up tightly with cheesecloth or some filter and place them in the pot with the ingredients.
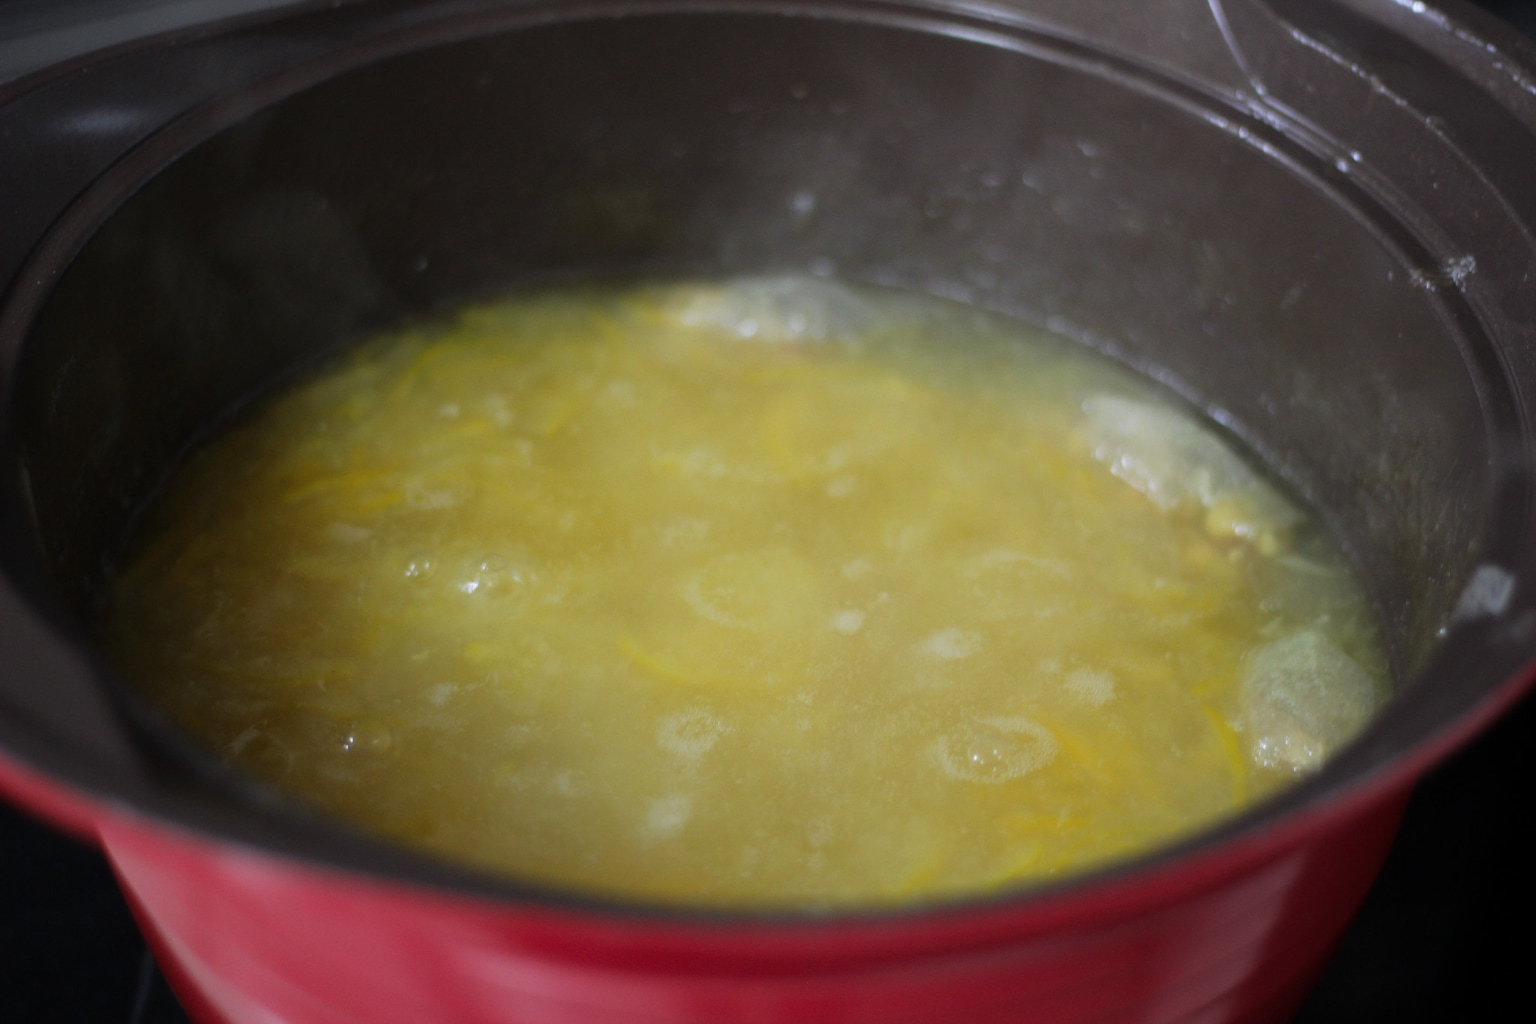
Turn the heat on and leave the mixture to heat up, mixing it slowly as it does. Try not to let the mixture boil but you want it to simmer. The mixture will take a long time to thicken. Depending on how big of a batch you are making, it can take anywhere between 40 minutes to an hour. During this time, keep stirring the mixture, making sure to stir around the edges of the pot.
Keep stirring the mixture until it has reached the desired thickness and then remove from the heat to be placed in jars. Remember, the jam will continue to thicken as it cools — a surefire way to check the thickness of the jam while it cooks is to place a teaspoon of jam onto a small plate and leave it in the fridge to cool rapidly. Once cooled, the jam on the plate will be an accurate representation of how thick the final product will be.
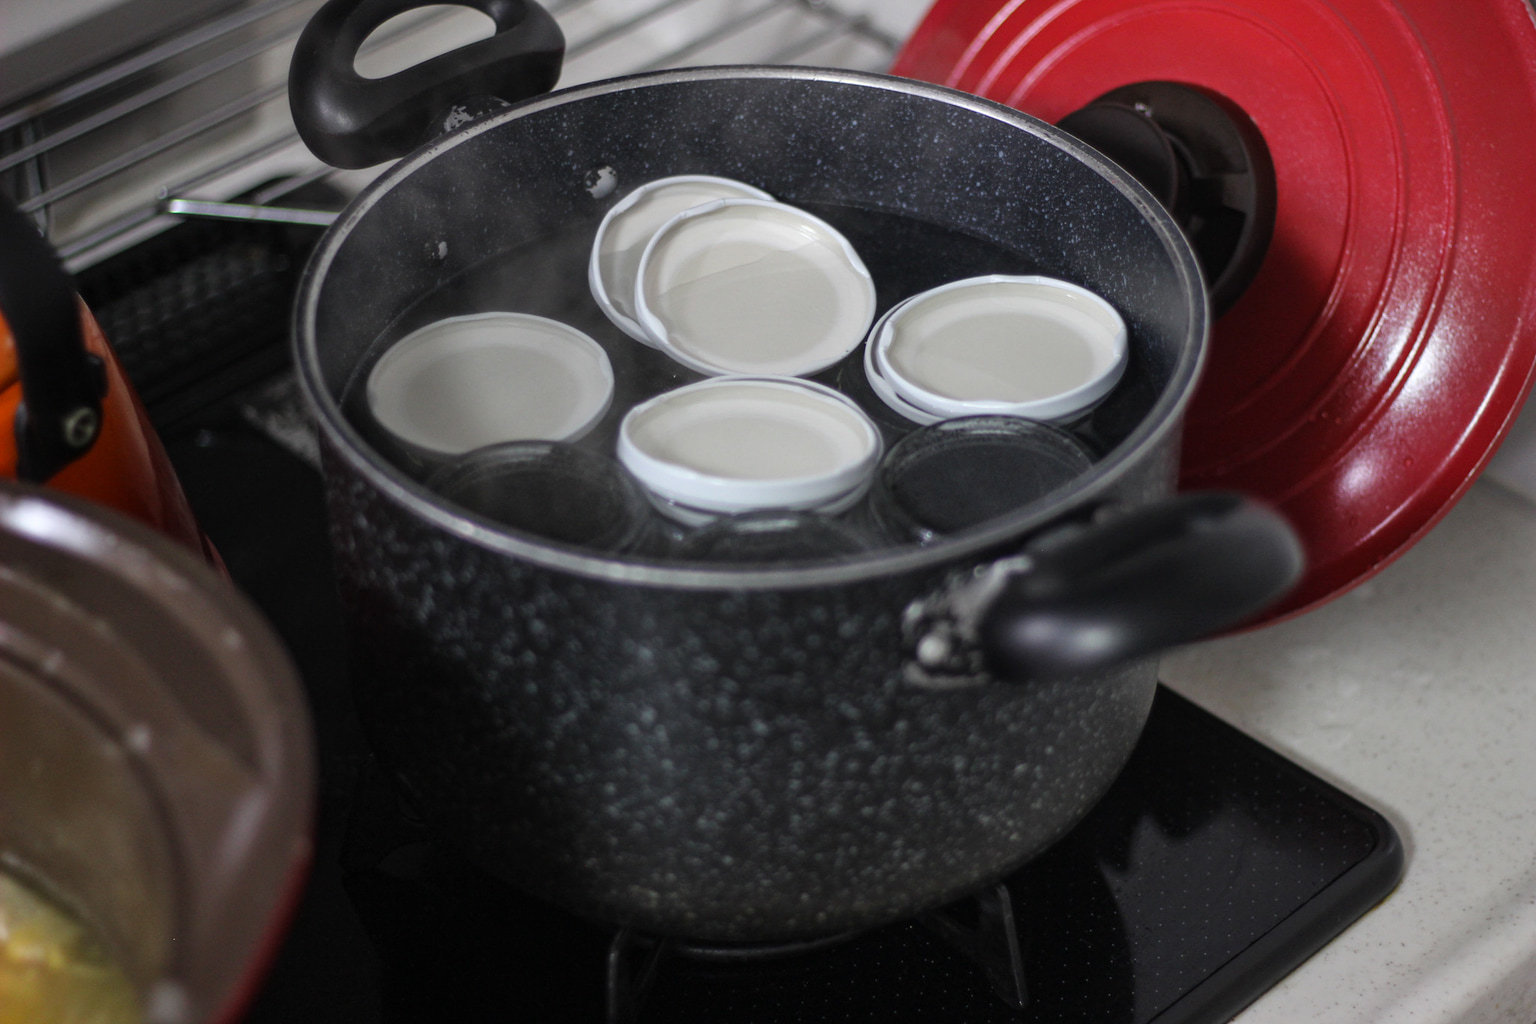
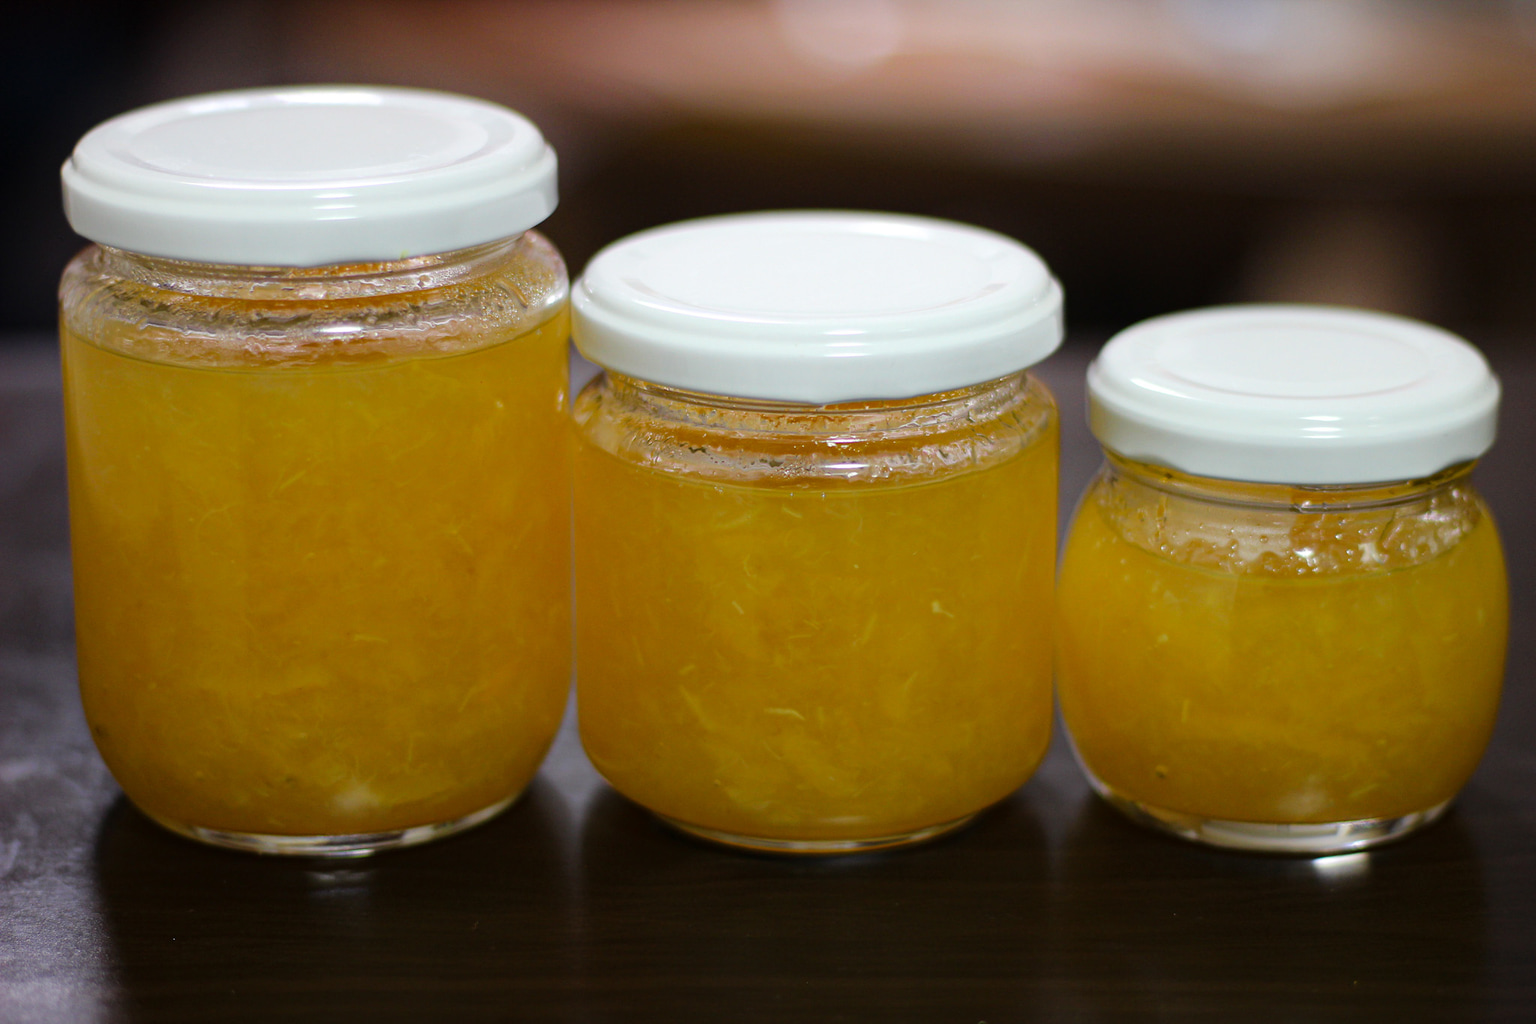
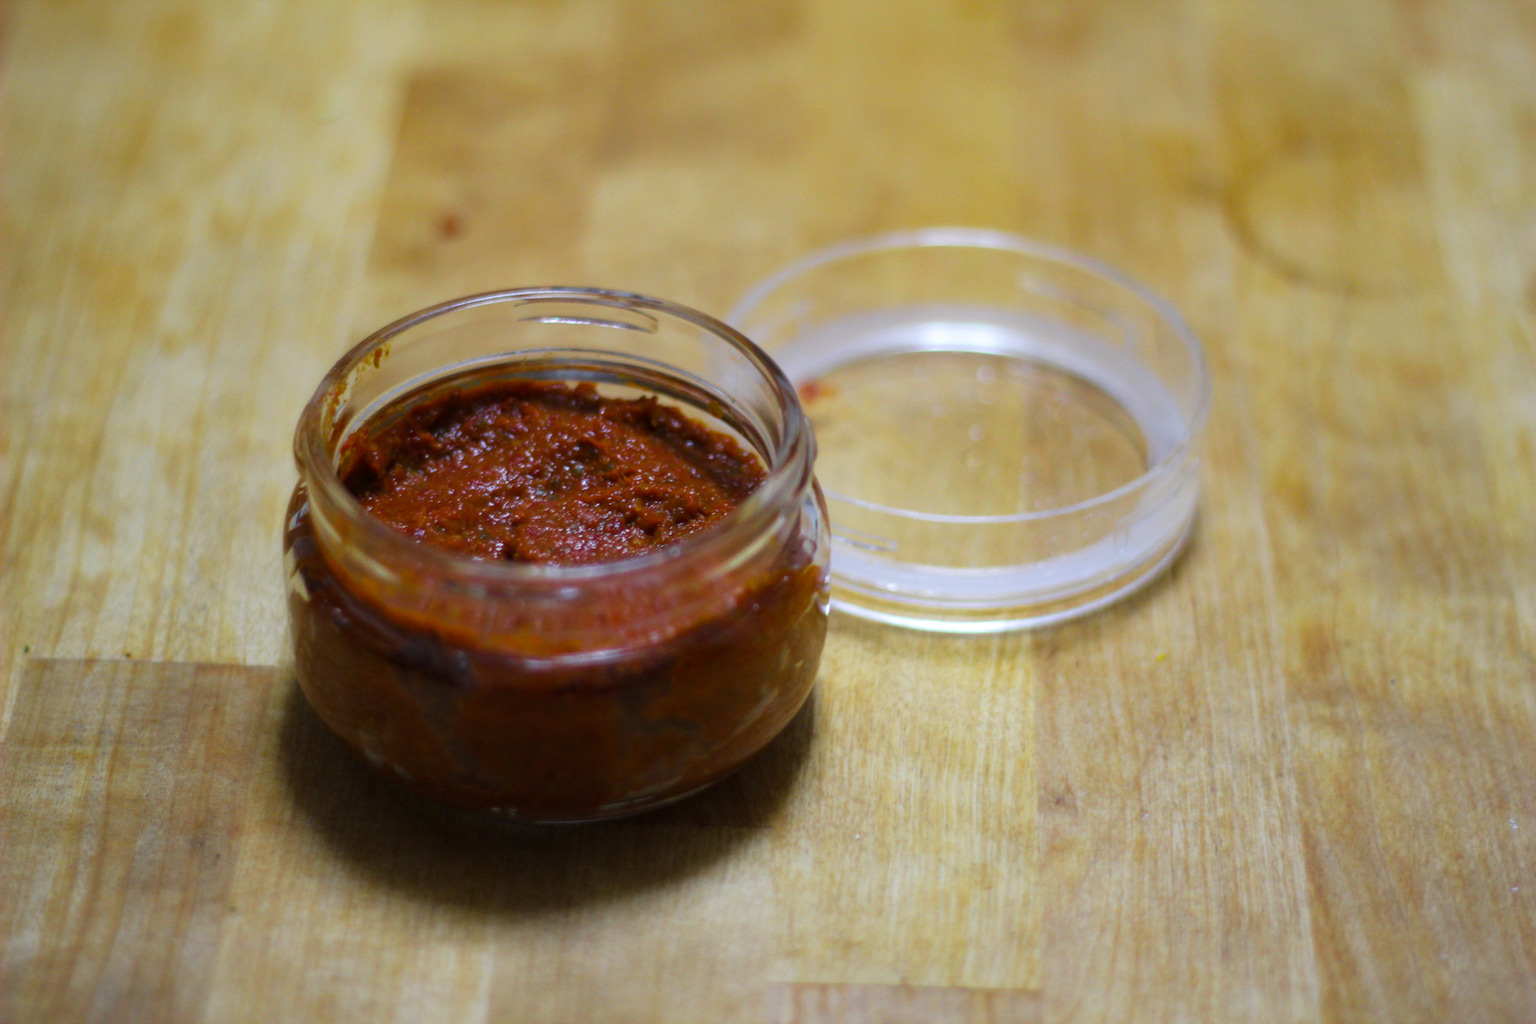
Once the jam has achieved your desired thickness, we must jar the mixture. Place your jars and lids into a boiling water bath to be sterilized. After around 10 minutes, remove your jars from the water bath, dry them and begin to fill them with jam, allowing a small space between the jam and the lid. Close the lid and place it back in the water bath so that the water just covers the lid. Leave the jars in the bath for a few minutes before removing them and leaving them to cool. If done correctly, the jars should have sealed. The jam will keep in the fridge for a few months.
Pro tip: Preparation of the final product should be done in one swoop. Making jam can be a little time consuming, but the final product is most definitely worth the effort.
Pro tip 2: Make sure you remove all the seeds from the flesh before you boil it. Accidentally cutting into one becomes a massive hassle.
Pro tip 3: Be careful when stirring the jam as nothing is worse than having to fish out seeds from puncturing a seed bag.
Recipe #2: Yuzu Kosho
This spicy, citrusy condiment is a staple in Japanese cooking. Delicious when paired with udon, gyoza or even used as a seasoning, this spicy-salty delicacy is a great addition to anyone’s pantry.
For this recipe, you’ll need:
- Chili 80%
- Yuzu zest 20%
- Salt – 10% of the final product’s weight
Just like when making yuzu jam, the weight of your ingredients decides how much of the other you’ll need. For example, if you have 180 grams of chili, you’ll need 20 grams of yuzu zest and then 20 grams of salt. Using round numbers makes the math part way easier.
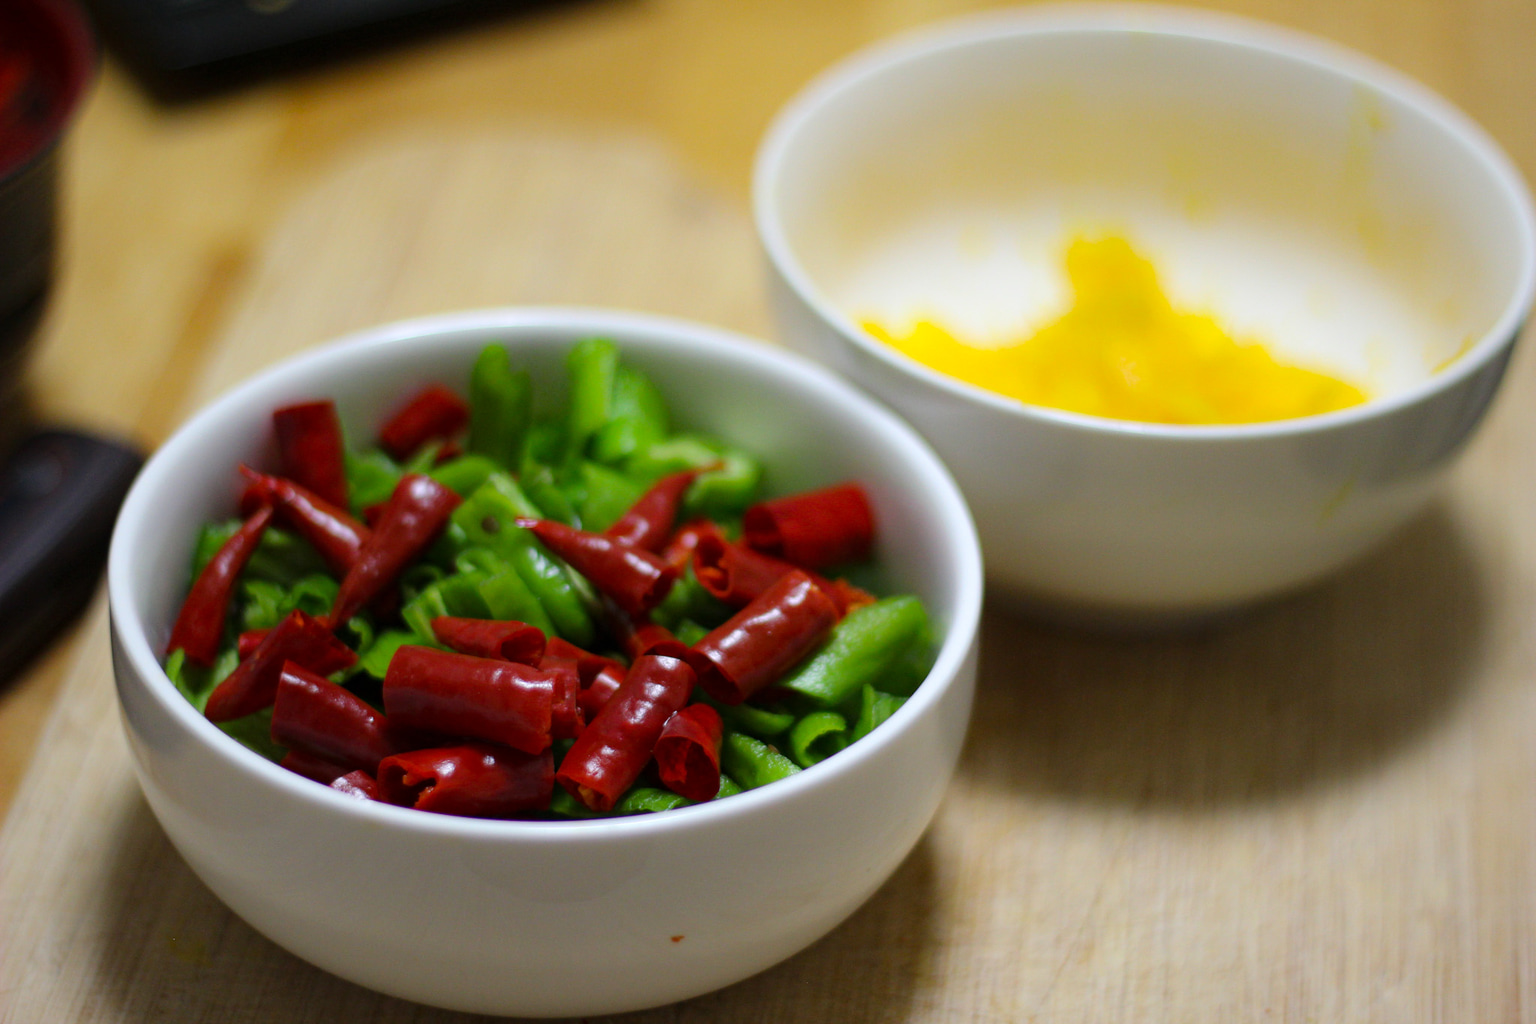
Make sure you are using a spicy chili for this recipe. As delicious as the mild tohgarashi is, it won’t stand up to the salt and slight fermentation process that this dish requires. Slice your chils in half and remove the white steam inside. It’s essential to remove all of it as adding it to the final product will result in an unpleasant bitter-tasting yuzu kosho.
Once the chilis have been sliced and weighed, place them into a blender to await their citrusy friends. Zest your yuzu until you have the exact amount of zest needed for your yuzu kosho. For my own, I needed around 20g of yuzu zest. For those who want to make the yuzu kosho extra delicious, add the juice of half a yuzu once all is added into the blender, add your salt and blend until smooth.
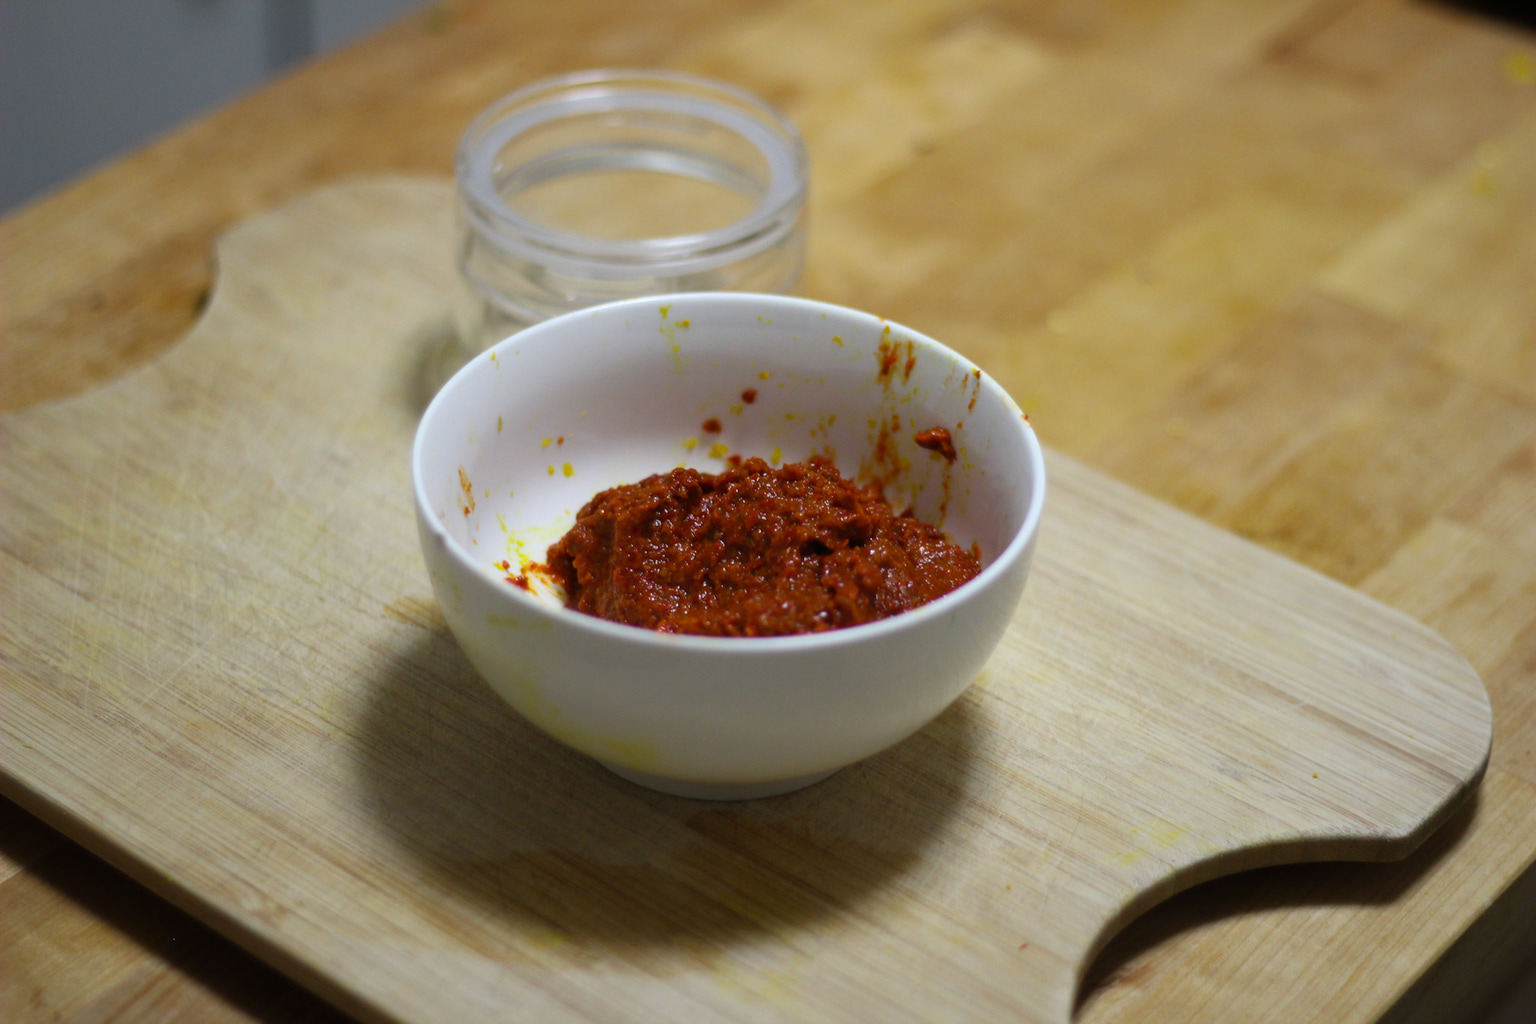
The mixture needs around a week to ferment before being complete. Take your mixture and place it into an airtight container and leave it in the fridge for a week for a little mild fermentation. The color and taste will dramatically change during this time and as eager as you are to sample the yuzu kosho straight away, it’s definitely worth the wait.
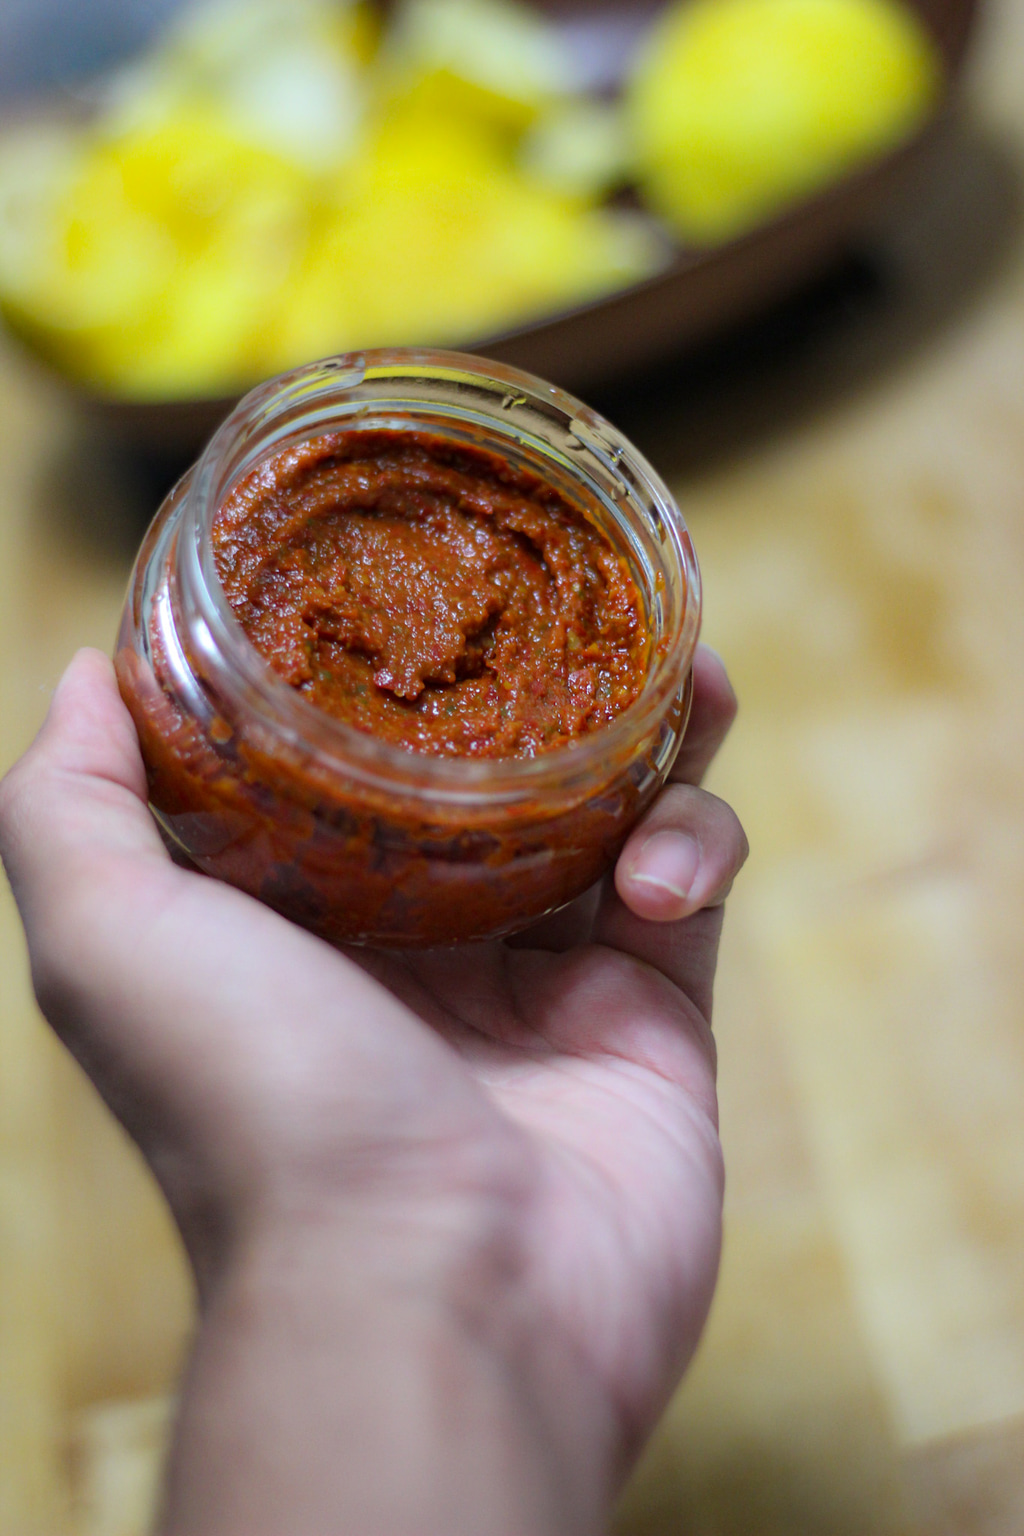
Pro tip: While red chilis were used in this yuzu kosho, any spicy chili can be used. Traditionally, green chilis are used but feel free to customize.
Recipe #3: Yuzu Kosho Karaage
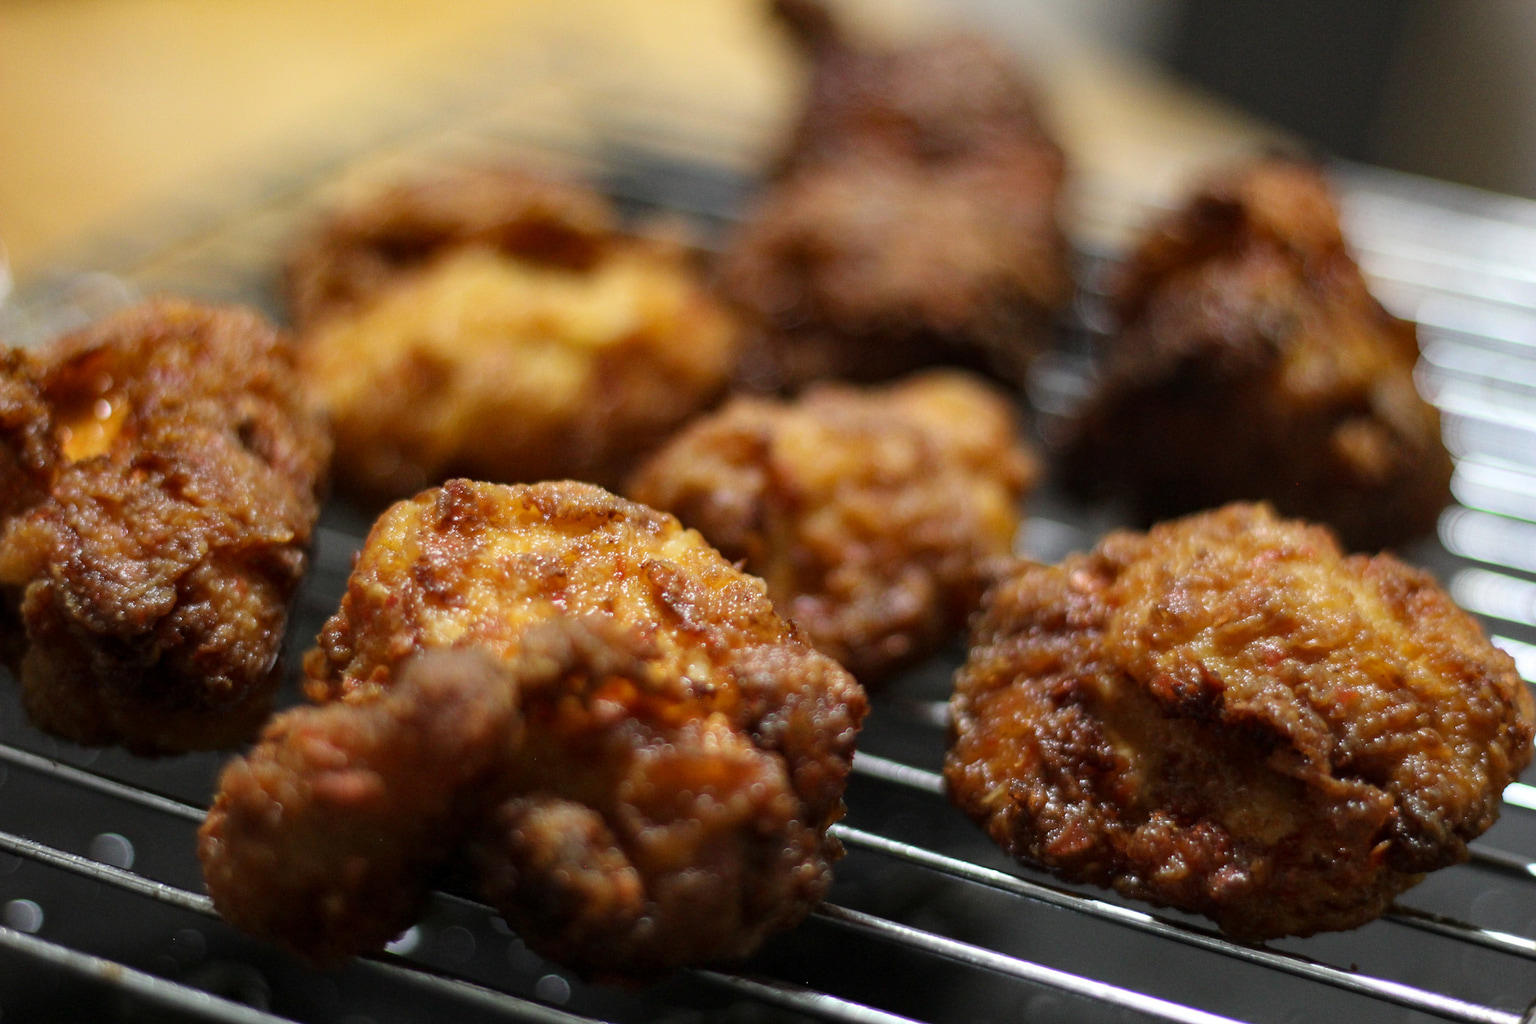
A staple dish, but those who have dabbled with making their own homemade karaage know how much of a blank canvas this dish truly is. Mixing a traditional karaage recipe with the spicy-salty yuzu kosho is a genius play bound to go down a treat at any dinner party.
For this recipe, you’ll need:
- Chicken Breast 350g
- Yuzu Kosho ½ – 1 tbsp
- Flour (starch)
- Yuzu zest ½ a yuzu
- Juice from ½ yuzu
- Soy sauce 1tbsp
- Mirin 1tbsp
- Pepper
- Oil for frying
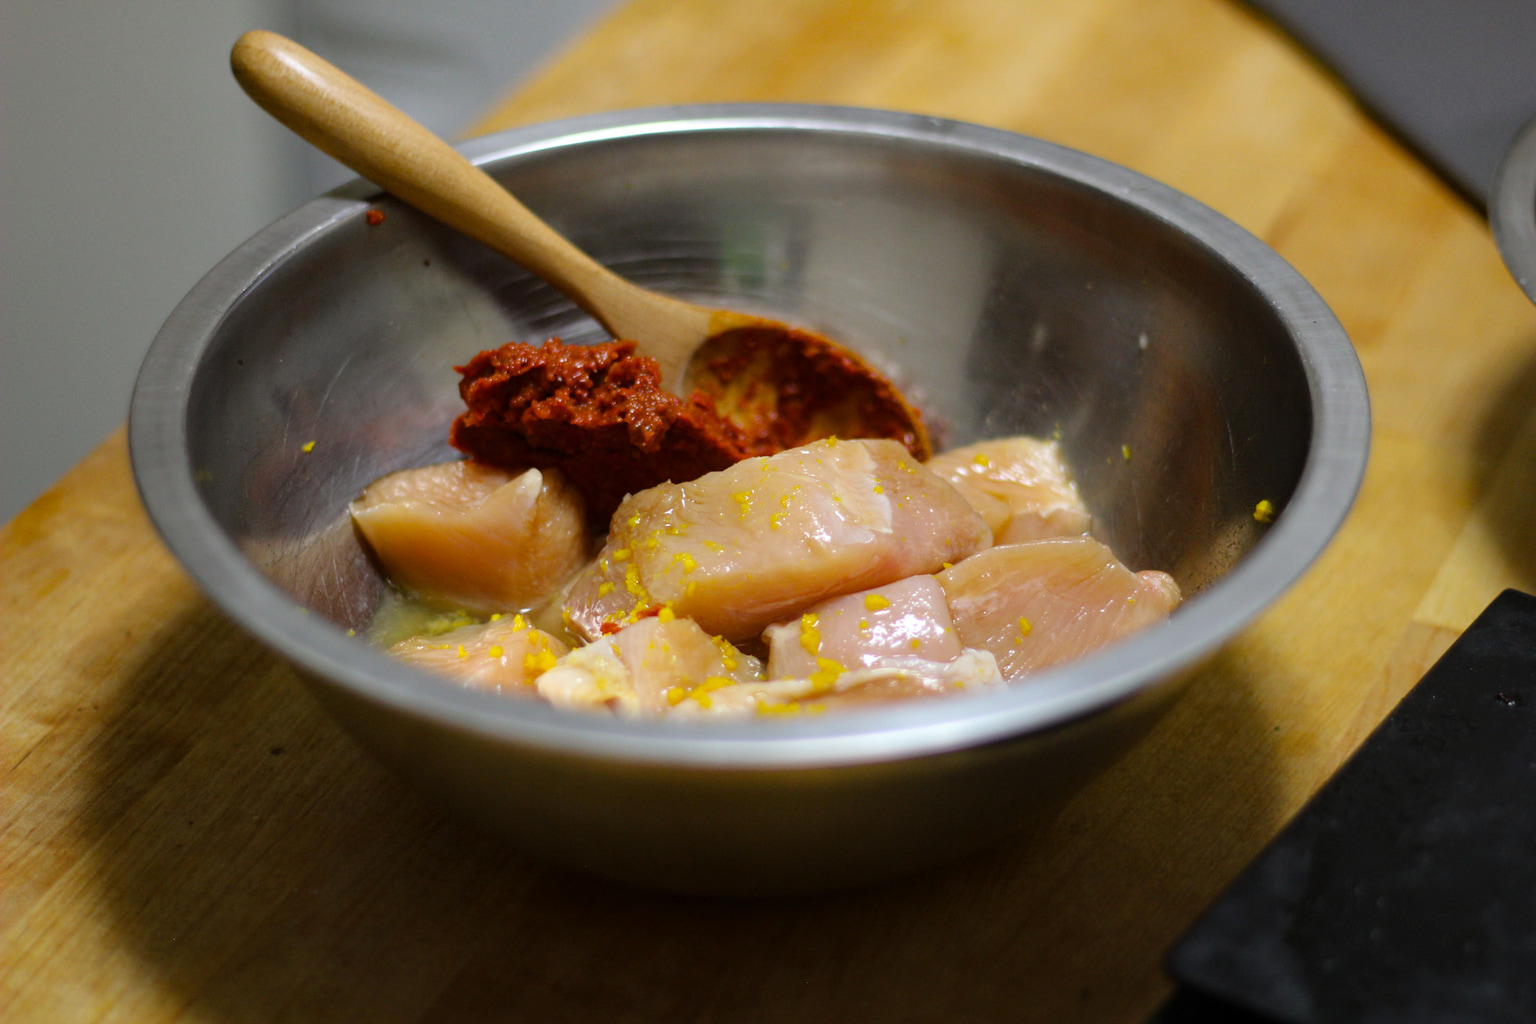
Start by preparing your chicken. Slice the chicken into medium-sized, slightly larger than bite-size pieces, and place the chicken into a large bowl. Into the large bowl add your soy sauce, mirin, yuzu zest, yuzu juice and finally the yuzu kosho. Mix well so all the chicken has been coated equally and then leave it in the fridge to marinade. You can leave it for around 30 minutes, but the longer you leave it, the deeper the yuzu flavors will seep.
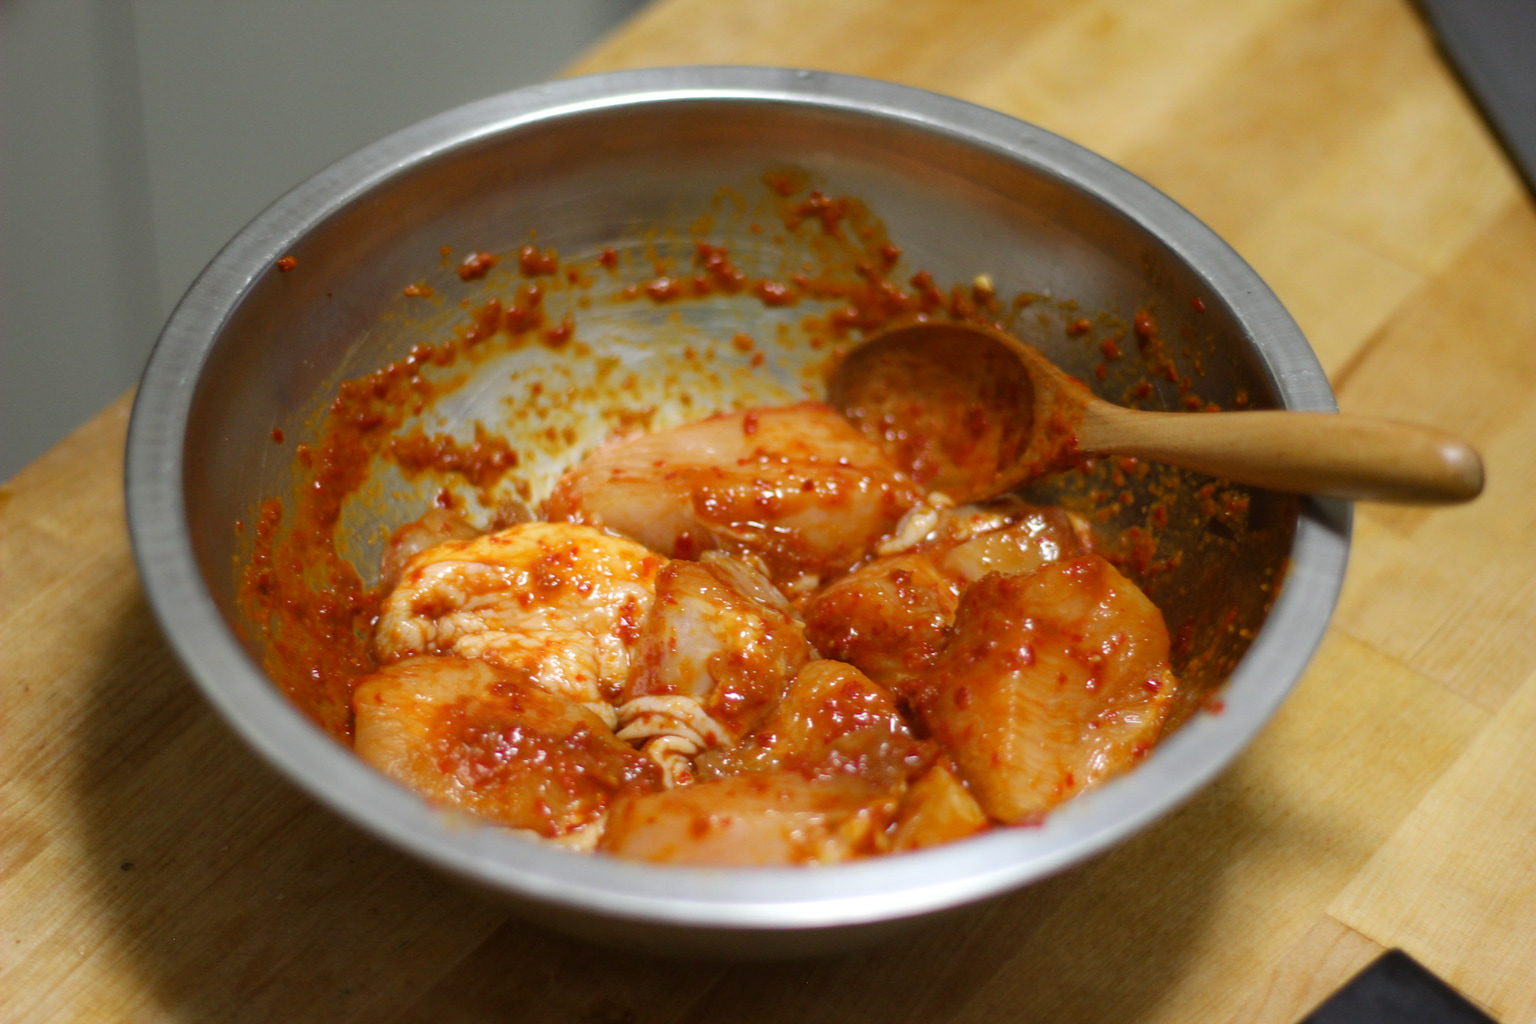
Once the chicken has been perfectly marinated, prepare your karaage coating. The seasoning on this particular karaage recipe is pretty strong and as such, a light dusting of lightly seasoned flour or starch is best. Lightly season your flour with pepper and coat your chicken with it.
Heat a pot of oil to around 180 degrees and fry your karaage for around 2-5 minutes or until the karaage is crisp and golden brown. Leave the karaage to sit for a few minutes after it leaves the oil — this allows for the karaage to finish cooking in its own heat. The size of your karaage pieces will change the cooking time, so be careful.
Pro tip: For the most authentic-looking karaage, use potato starch. But for those who are on a gluten-free diet, rice flour also works just as well.
Recipe #4: Yuzu Mayonnaise
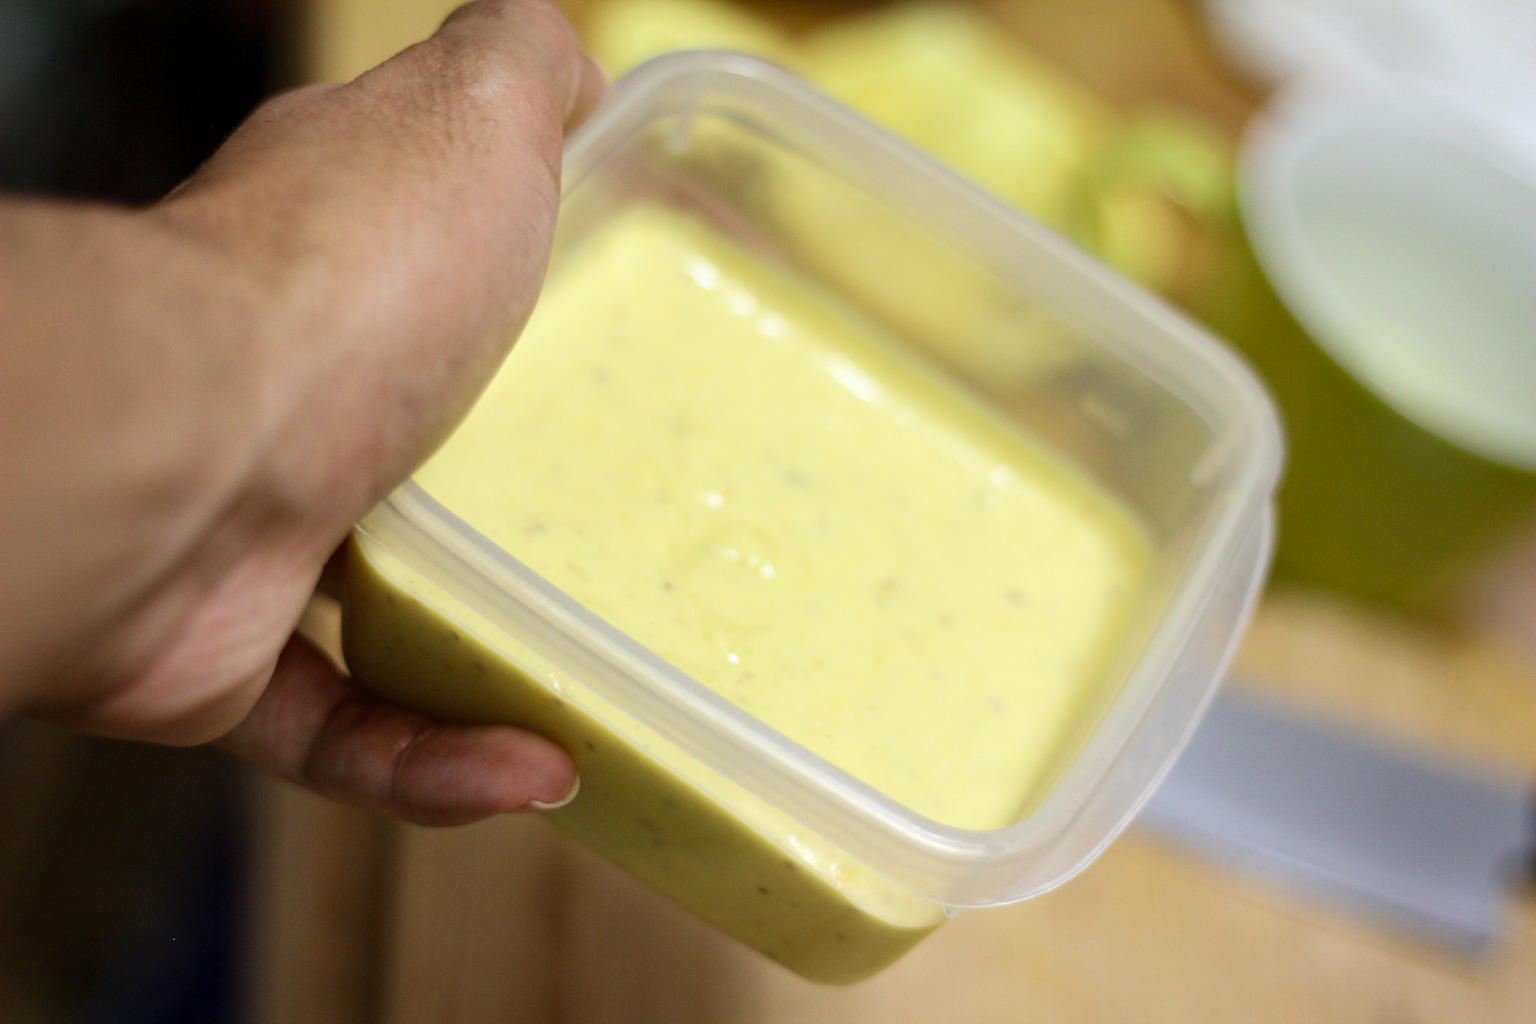
What better addition to your homemade yuzu kosho karaage than some homemade yuzu mayonnaise!
For this simple mayonnaise recipe, you’ll need:
- 2 egg yolks
- Mustard
- Zest from 1 yuzu
- 200-250ml of oil (sunflower or olive oil is best)
- Yuzu juice to taste
- Salt and pepper for taste
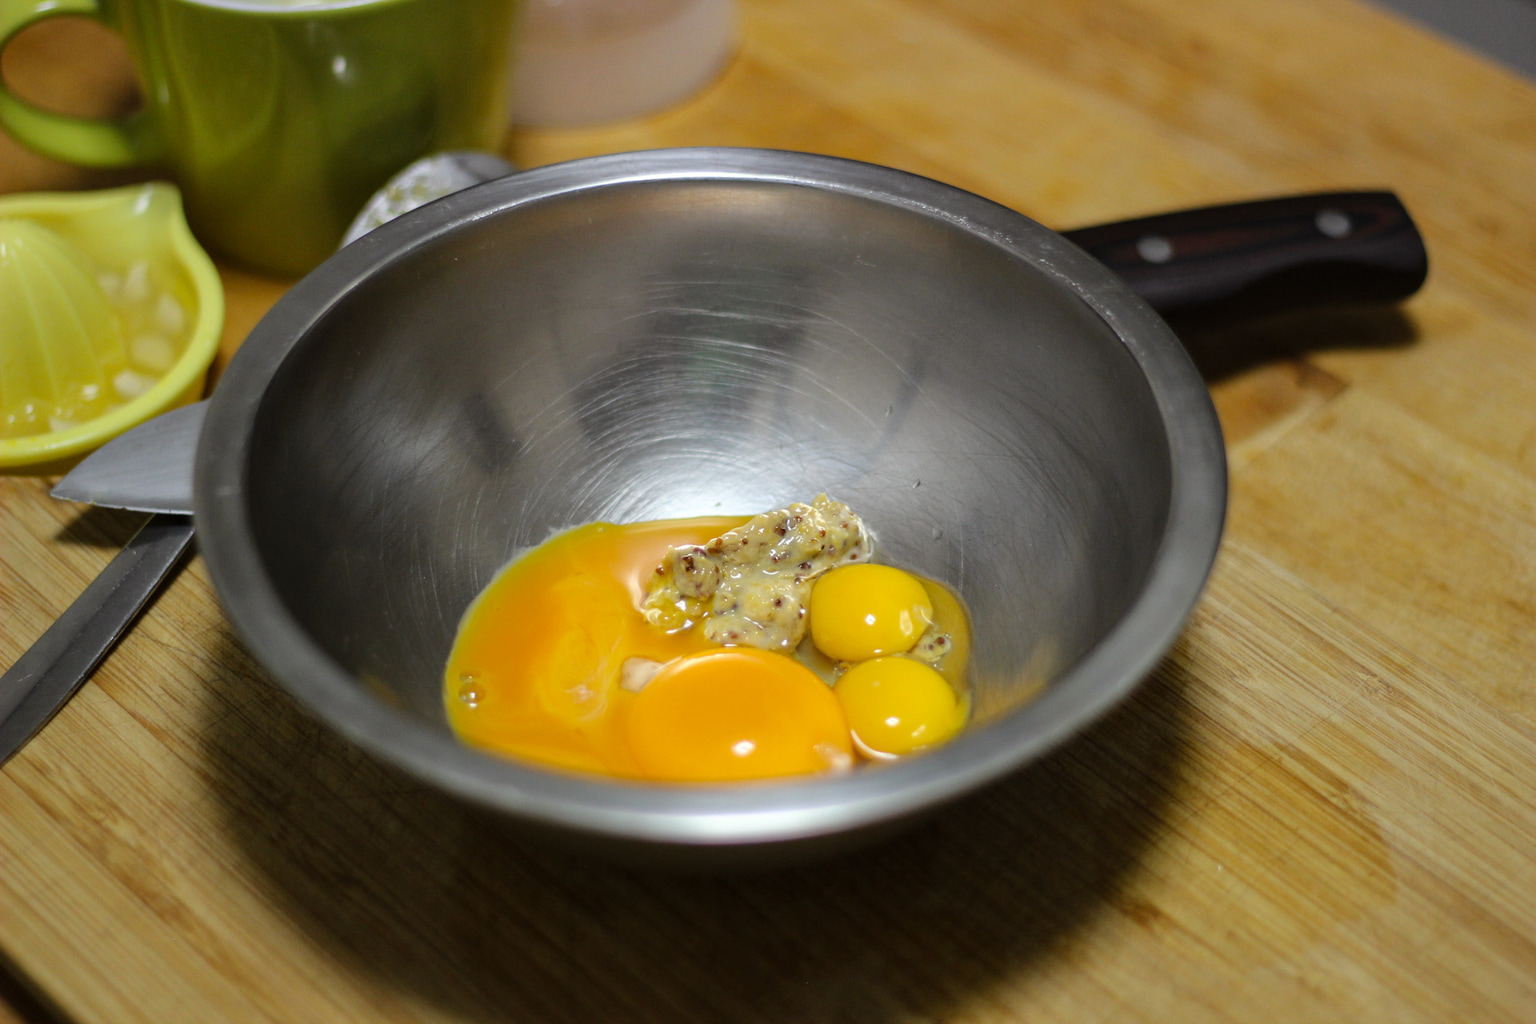
In a large bowl or mixer, place your two egg yolks and mustard and mix until well combined. Now the gauntlet begins. Slowly begin adding the oil to the egg yolk mixture, a tiny bit at a time, and mix until well combined. Be extra careful not to add too much oil at once as this will cause the eggs to curdle and leave your mixture useless.
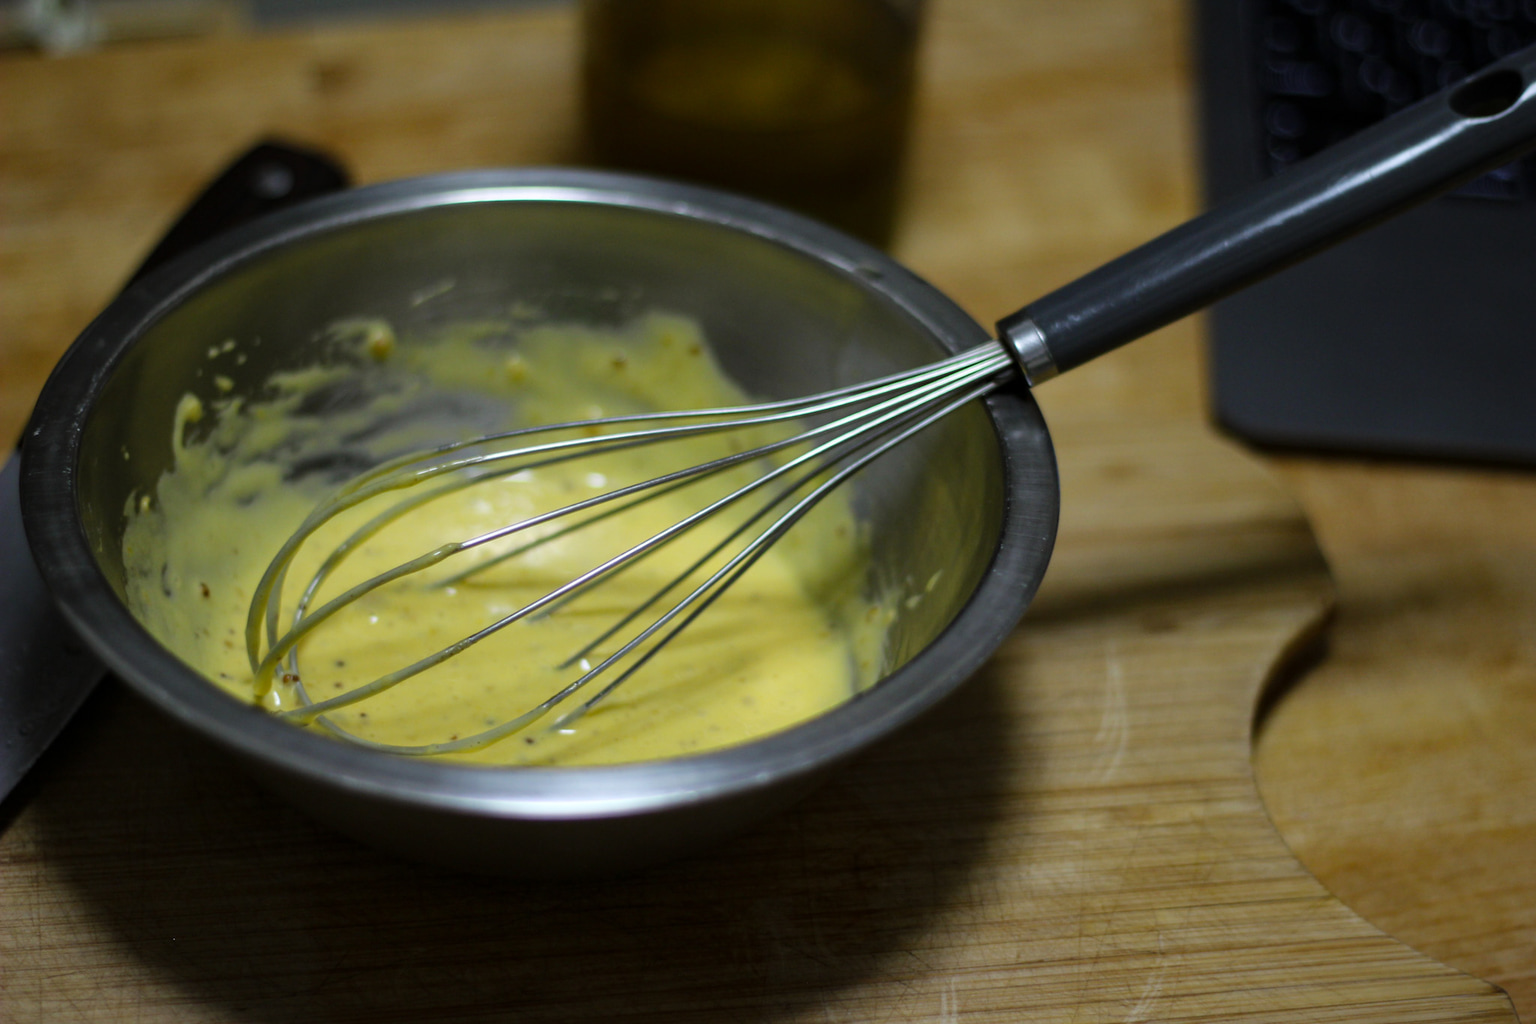
Start with a single drop of oil and whisk well until fully combined. Repeat this process until the mixture as thickened a little and you are confident that more oil can be added in one round.
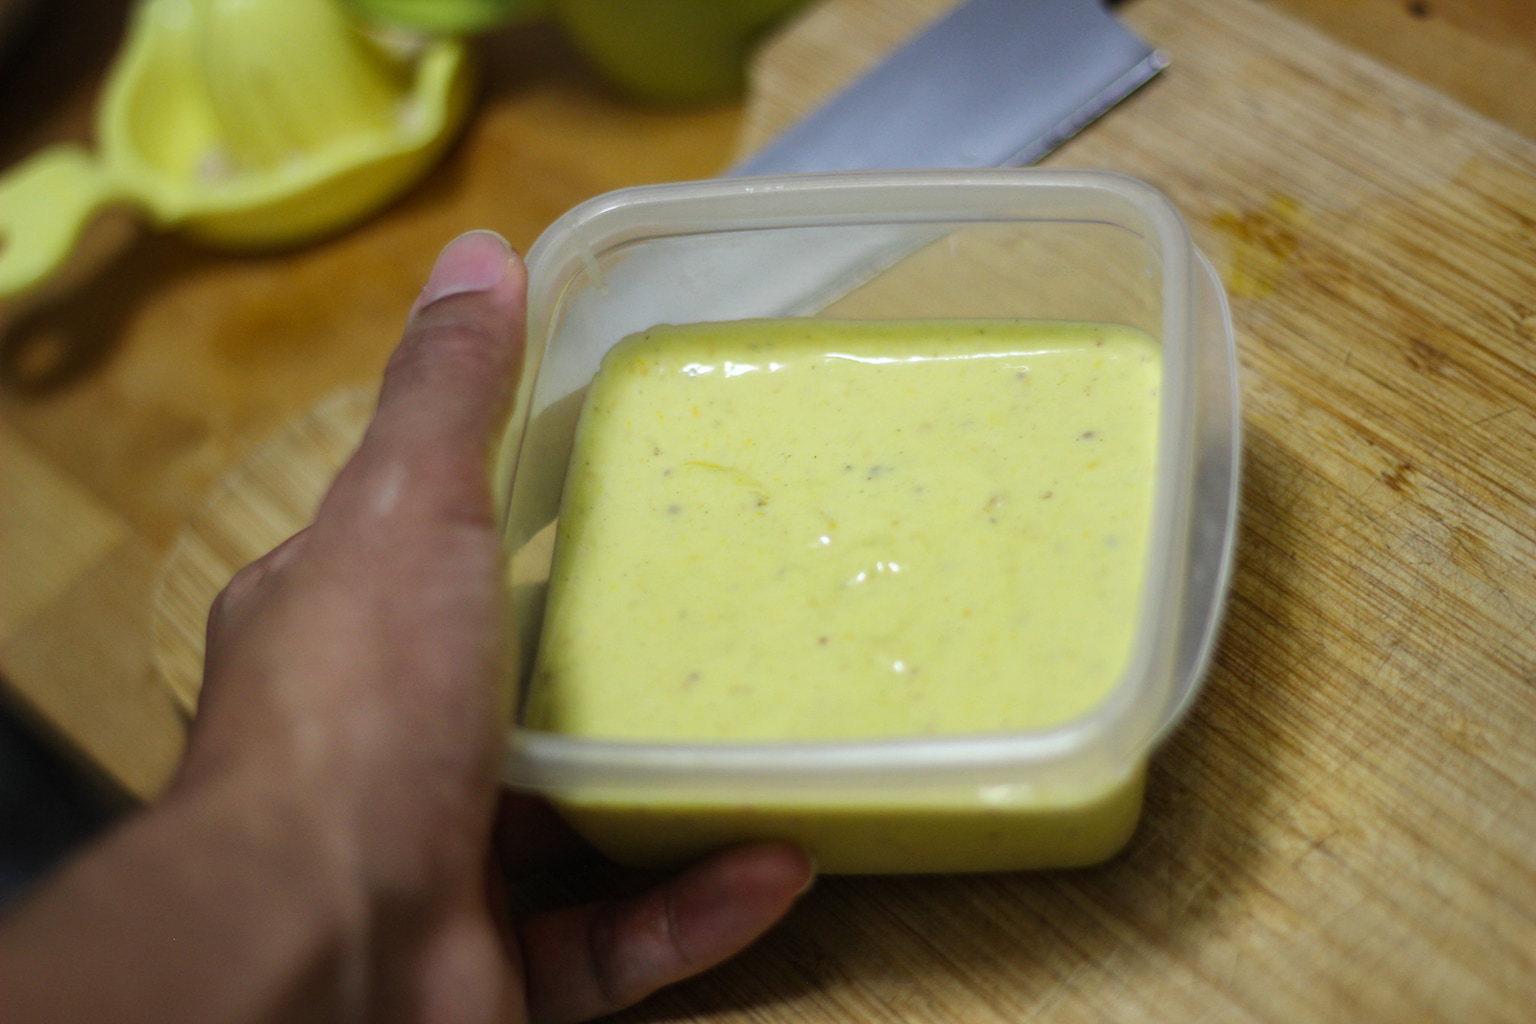
Once the mayonnaise mixture has reached your desired thickness, begin seasoning your mayonnaise with salt, pepper and yuzu juice and zest. Taste after each round of seasoning until you have the desired yuzu flavor you are looking for. As I love my yuzu mayonnaise to be packed with yuzu flavor, I tend to use yuzu zest, peel and also the juice of one yuzu or two.
Recipe #5. Simple Yuzu Cake
No list about yuzu would be complete without a cake. This simple yet delicious yuzu sponge is perfect for family gatherings and is simple enough for those little helpers to also get stuck in.
For this recipe, you’ll need:
- Sugar 200g
- Unsalted butter 200g
- Zest of 2 yuzu
- Juice of one yuzu
- 3 eggs
- Self-raising flour 215g
Optional yuzu frosting
- Egg yolks 2
- 75g sugar
- 2 yuzu zest and juice
- 100g Mascarpone cheese
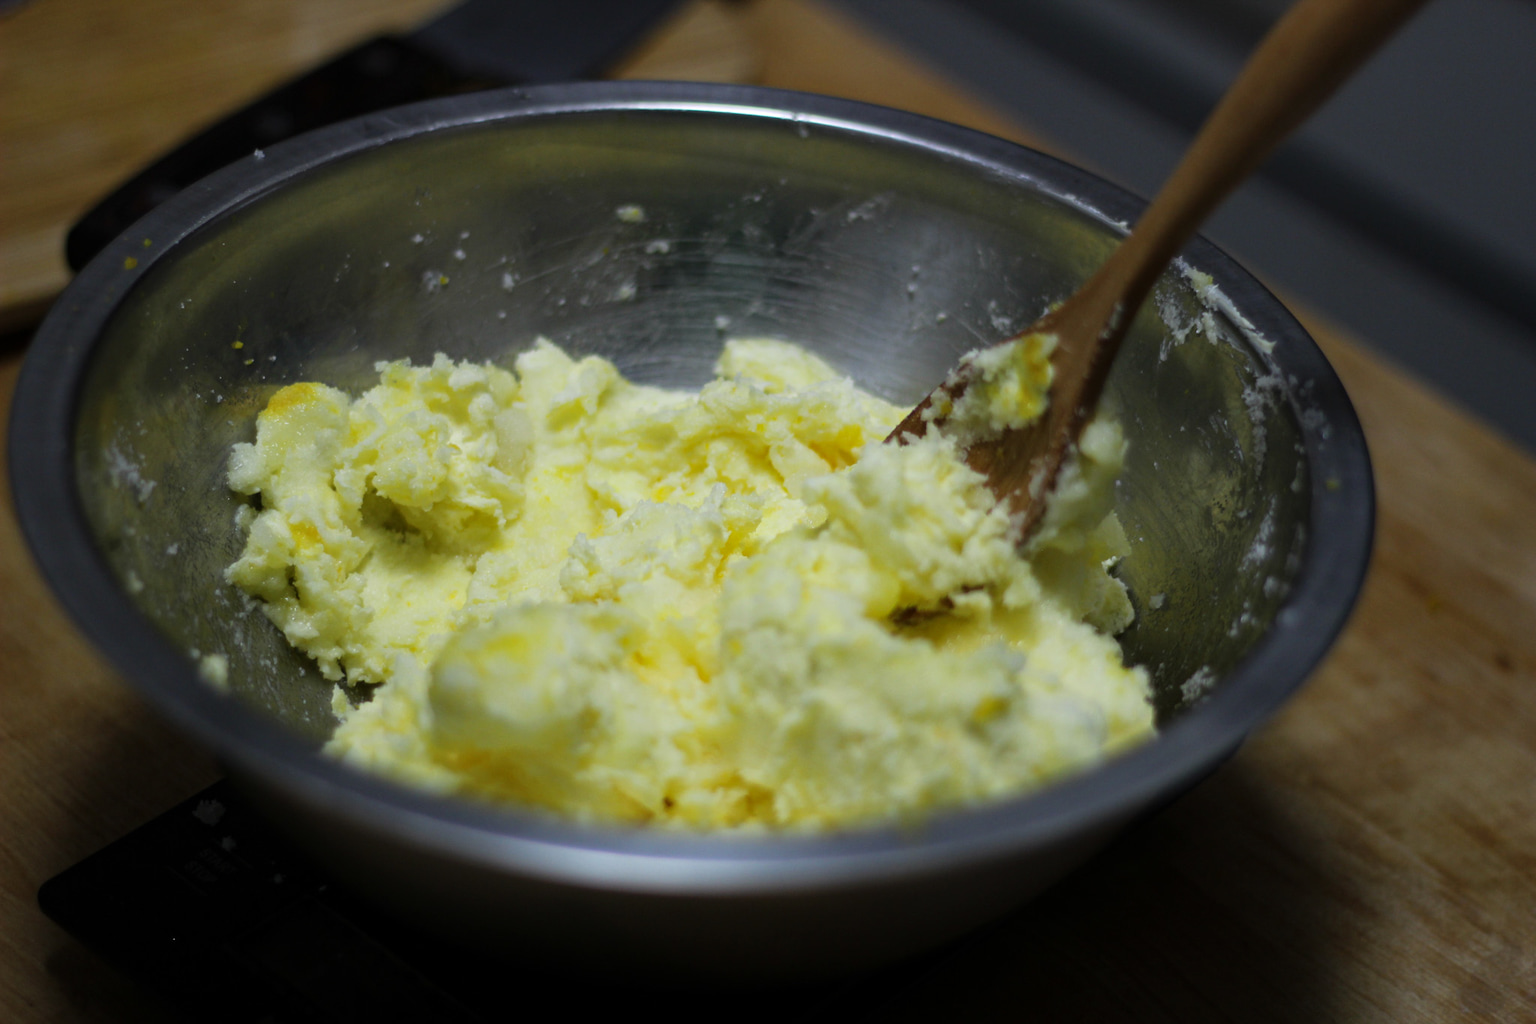
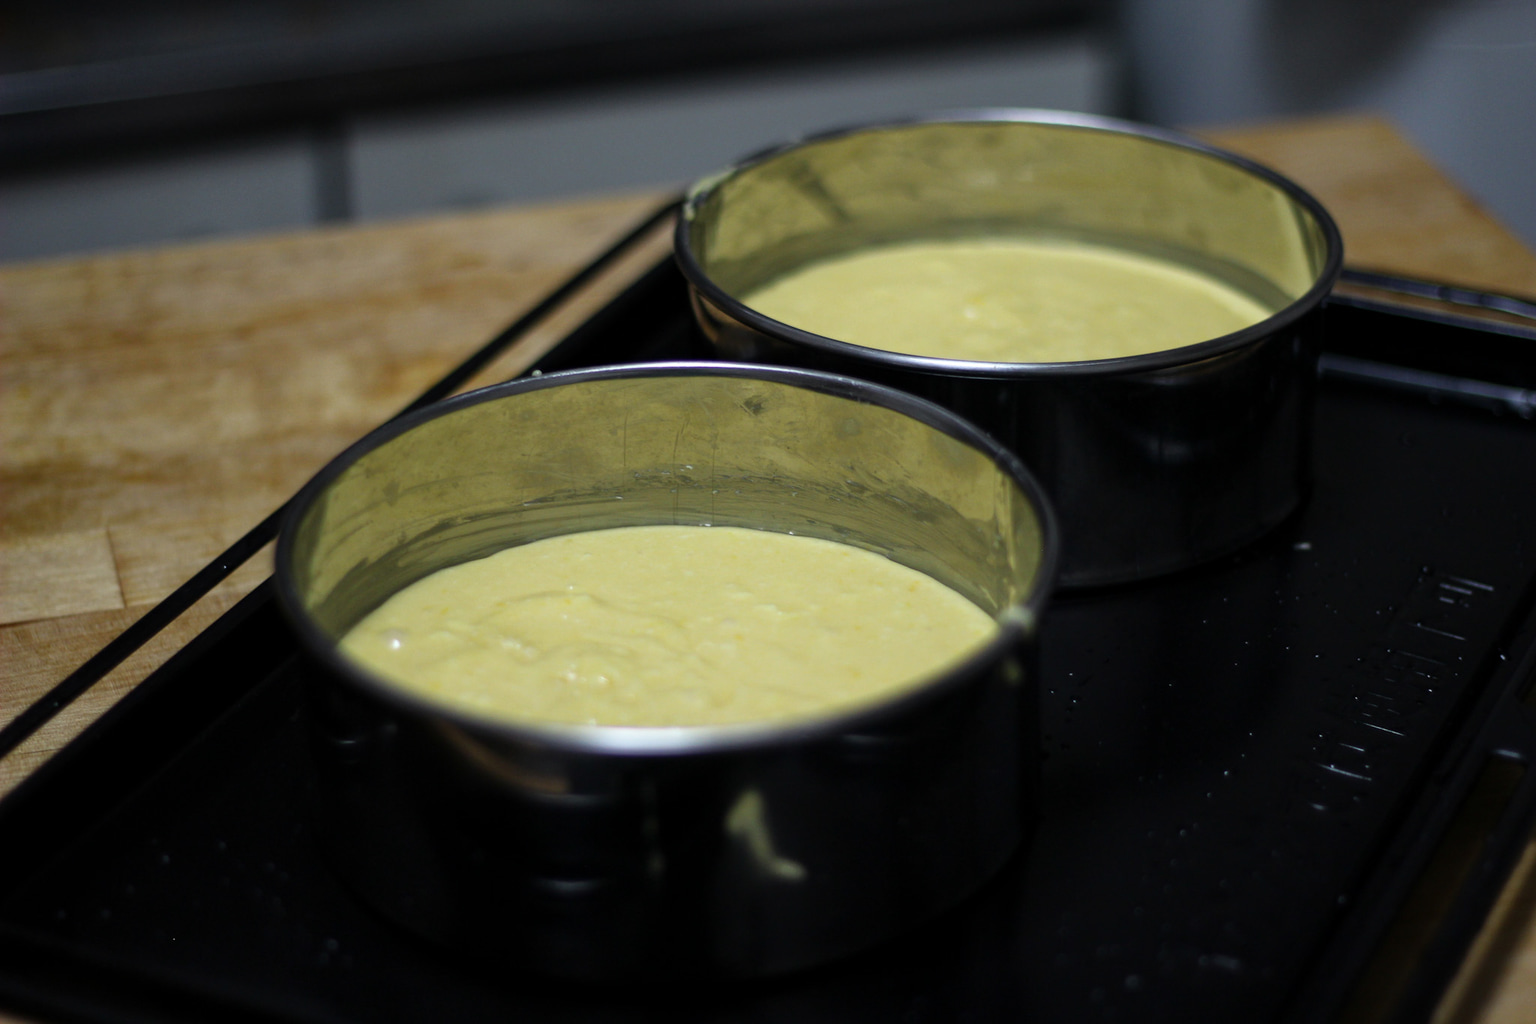
In a large bowl, whisk together your sugar and unsalted butter until it combines into a fluffy mass. In a smaller bowl, beat three eggs and slowly incorporate them into the sugar-butter mixture whisking each time. It’s important to do this part slowly to stop the eggs from curdling. Once all has been mixed in, fold in 215g of self-raising flour and continue to mix while slowly adding your yuzu zest and yuzu juice. Keep mixing until no more flour can be seen.

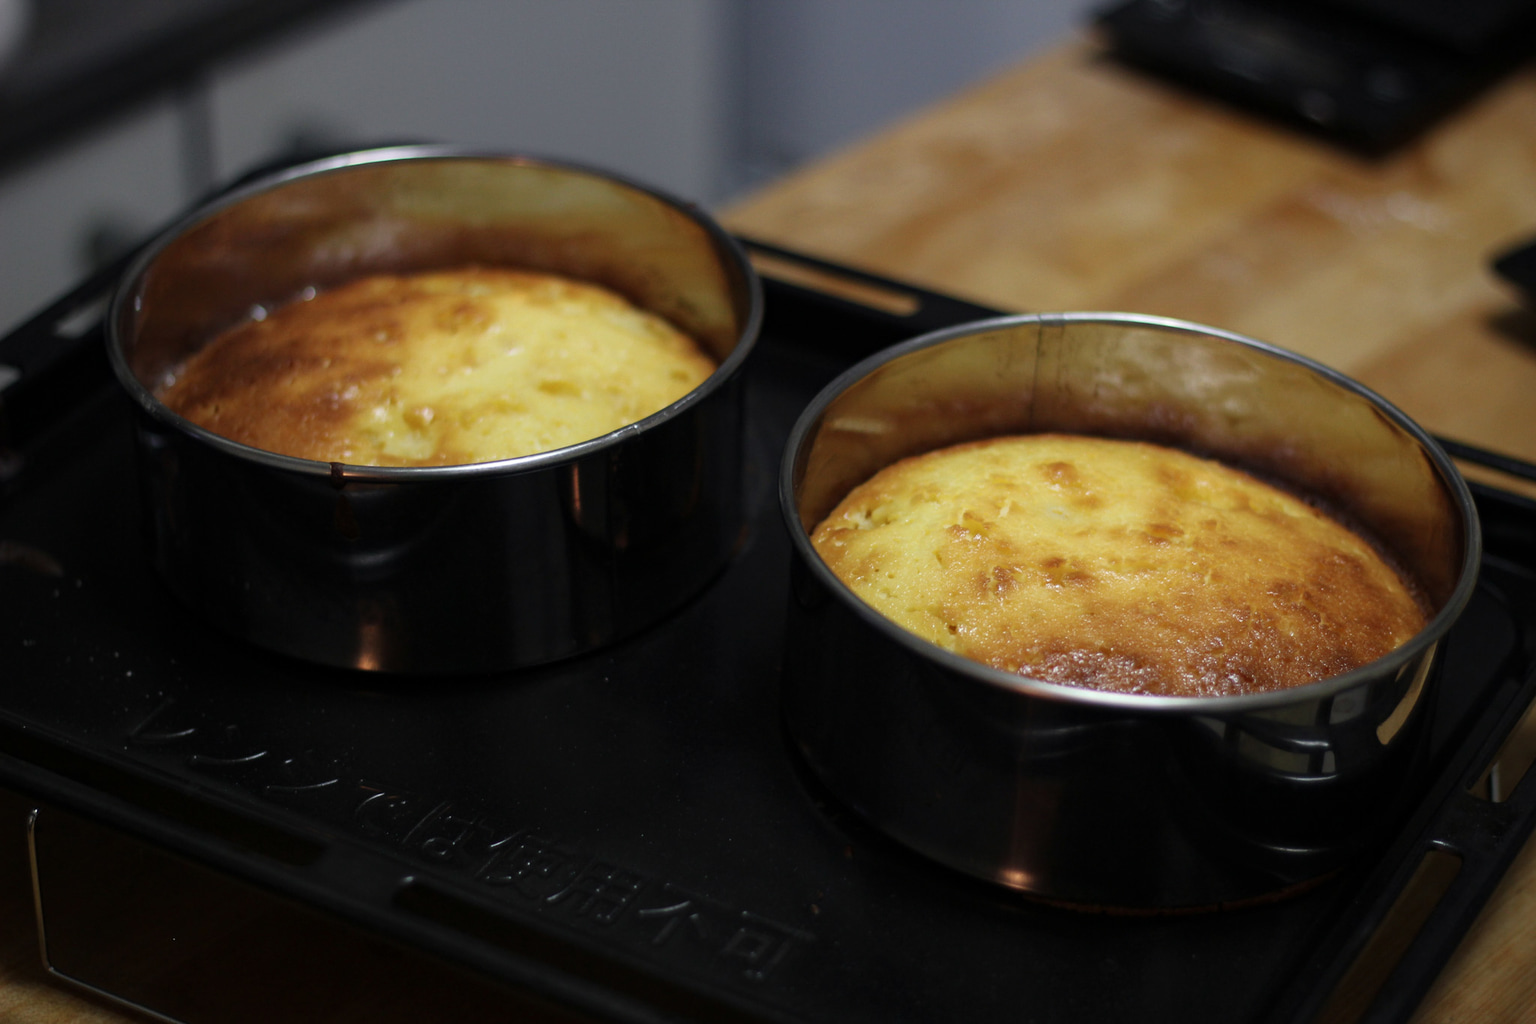
Preheat the oven to 180 degrees while you grease your chosen baking trays with a thin layer of butter. Pour the batter into the baking tray and place it into the oven to cook for around 30-35 minutes or until the center is no longer wet.
For the optional yuzu frosting, whisk together 2 egg yolks and 75g of sugar with the zest and juice of two yuzu. Once all is combined, add in your mascarpone cheese and place it between the two cake layers. If you have any leftover yuzu jam from the first recipe, this will be the perfect time to bring it out.
For other seasonal ingredients recommendations and recipes, see here.